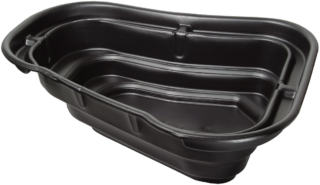
Preformed pond
A preformed pond or pond basin is a synthetic basin, usually made from HDPE (High Density Polyethylene), in the form of a pond. These preformed ponds have become very popular in the past few years and with good reason. They offer many benefits. For example, they are strong and durable and resistant to UV and ozone, at a relatively low weight. They are available in very many different shapes. Square, rectangular, round, oval, L-form or in your own design.
Installing a preformed pond
Below we are giving a short description of the laying out of a preformed pond.
- Dig a hole for a pond, which is about 4 inches deeper and wider than the depth and width of the preformed pond. Apply amply 4 inches of blow sand or plate sand to the bottom of the hole so that, after applying it, the pond basin will project somewhat over the hole. After filling with water the pond basin will sink a little more in the sand because of its weight.
- Put the basin in the middle of the hole to the effect that there will be an equal free room on all sides of the pond. Make the preformed pond level by moving a beam with a spirit level on top to and fro over the edge of the pond basin. Do this in all directions. The top edge of the pond should be exactly level. If not, when filling the pond one side will flood already whereas at the other side the water will still be below the edge of the pond basin.
- Apply a layer of 4 to 6 inches of pond substrate or pond soil to the bottom of the preformed pond. This is important for water plants and for the development and the housing of useful bacteria. Never use ordinary garden mould or potting compost, because they are far too rich in nutrients and will consequently stimulate the forming of algae.
- Fill in the room between the preformed pond and the pond basin with blow sand. Make it easy for yourself by making thick porridge from blow sand and water and pour it in the intermediate room. Fill the intermediate room several small steps. Simultaneously allow tap water to flow into the pond till about the same height as the level to which you filled the intermediate room with sand. This will prevent tension and damage in the preformed pond.
- If the pond basin has been filled up to about 1/3, you should inspect once again whether the upper brim is level. Now you can correct the pond basin, if necessary. Subsequently put the pond plants in the pond.
- Proceed filling with sand and water till about 8 inches below the brim. Rest the pond for a few days so that it can set. If it appears that the pond is no longer quite level, the best thing you can do is to camouflage the slant brim with plants.
- After a few days add blow sand up to about 8 inches below the brim. Subsequently additionally add ordinary garden mould on behalf of the plants round the pond. Add additional water till the level you want.
- Finish the brim with plants and other brim material.
The installation of the pond is ready now. However, the new pond needs time to reach a natural biological equilibrium. At this stage the quality of the water is not optimum yet. First the pond plants and the valuable bacteria have to grow. Therefore wait with introducing any fish. The process can be accelerated with different products. Before introducing any fish you should always measure the quality of the water.