



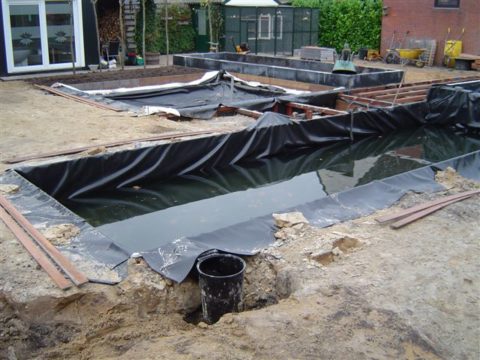
A handy step-by-step plan for building a pond.
Constructing a pond is a considerable but very fun job. Especially if you already have an existing garden without a pond, this means a thorough renovation. If you are building a new garden and plan to build a pond, at least this will save some work.
Building a pond is no easy task. A common mistake people make is that they just start digging a hole, add a pump and filter and you’re done. Unfortunately, this is not the case. Creating a beautiful pond takes a lot of time, but it gives you a great hobby!
When is the best time to build a pond?
Building a pond is best done in April/May. Especially if you want to build a pond with plants in it. You can also build a pond in the fall, but wait until spring before planting it. Do you suffer from high water levels in the garden? Then a foil pond is not suitable. There will be too much pressure on the bottom of the pond and this can cause the liner to rupture.
Pond construction step 1: pond design

First, ask yourself what type of pond you want. For tips and explanations about the different types of ponds, read our blog “what types of ponds are there”. To avoid mistakes, it is important to know in advance what kind of pond you want and what fish and other flora and fauna will be in the pond. Mistakes that are made are often not easy to fix. Constructing a pond takes a lot of time and money, and you should definitely keep this in the back of your
mind.
Once you have determined which pond you would like, it is important to make a good design of the pond. A good pond design consists of a plan of the garden where the pond should be drawn in. Then you create a cross section of the pond, with clean horizontal and vertical walls, and bottoms where each depth fits the plants you want in that spot. And finally, a planting plan. Choose a spot with at least six to eight hours of sunlight per day. Don’t place a foil pond too close to trees or shrubs. Roots can damage the liner and pounds of fall leaves must be collected to prevent them from entering the water. Want a more natural pond? Then provide nice round shapes and let the pond floor within the liner slope smoothly from shallow to deep in the middle. Otherwise, if you create a sloping surface under the liner, all the plants will slip away there and you will get bare spots. Do you choose a sleek pond? Then use nice clean lines.
Pond construction step 2: pond digging preparation
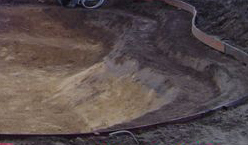
Once you have the design ready you are going to prepare the construction properly. Make sure all the materials and tools are in place. You can choose to use a preformed plastic
container that you dig into the ground, but of course it is best to use pond liner. Make sure the ground is leveled and it is very important that the ground around the pond is free of roots of plants and trees. These can grow through the liner at a later date, which is of course not the intention. Next, clearly mark the contours of the pond by hammering plastic stakes into the ground every 60 cm. Dig out the entire pond surface to the depth of the shallowest planting surface and use stainless steel screws to screw a plastic fence slat level to the stakes. Repeat this process at each further depth step of the pond. Keep in mind that on any sloping liner surface, no covering will remain so bare liner will always be visible here.
We also recommend plateaus for the different aquatic plants. Aquatic plants are active at different depths. If you opt for a mirror pond, plateaus are of course not necessary. Keep in mind that the lower part of the pond will be 10 cm deeper than the planned depth. This is because 20 cm of substrate and possibly pond soil and gravel will be placed here. Are you unsure about how deep each zone should be? Then please contact our customer service to be sure.
Start by digging the entire surface of the pond and then work further and further toward the center. Be sure to measure everything at all times and make sure it is level. While digging, pay close attention to roots and other sharp protrusions. Remove all of these. Do not leave the pond pit open and exposed for too long after digging. This procedure will prevent a plateau edge from calving under the liner during maintenance.
Constructing a pond step 3: installing pond liner
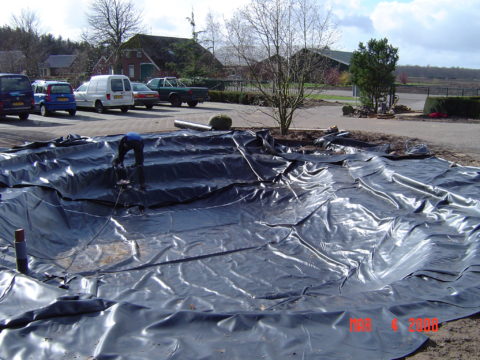
Before applying pond liner , it is important to apply a layer of about 10 cm of white sand. This layer serves as a kind of extra protection and is also a bed for the liner. If the pond liner is laid directly on clay soil, rising groundwater can push up the liner. The bed of coarse white sand disperses this pressure and directs the groundwater away to the sides. Next, you can start laying down the pond liner. For the amount of pond liner, keep the following rule of thumb:
- Pond length + 2 x depth of pond + 2 x 50 cm
- Pond width + 2 x depth of the pond + 2 x 50 cm
Lay the liner on the bottom and try not to walk on it. Make sure it is not too tight, because when the water is pumped into the pond the liner will be even tighter due to the pressure. If there is no water in the pond yet, it will look unsightly, but this will resolve itself once the pond is filled. Leave a foil edge of at least 50 cm. This can be buried later when finishing the edge.
Once the liner is neatly in place, all substrates and planting beds can be inserted and planted. Water lily baskets can also be placed.
Building a pond step 4: filling the pond
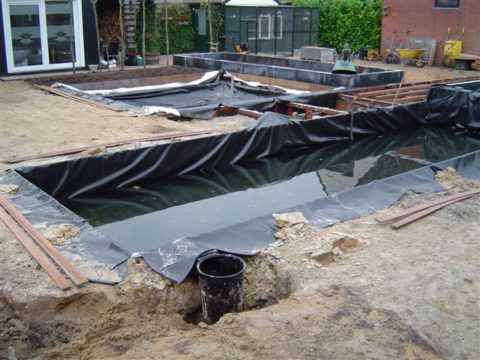
It’s almost time to start filling the pond. But before you turn on the tap, cover the entire pond bottom with substrate. Simultaneously add a dose of Bacterial , water-purifying bacteria that quickly create a stable pond environment. Always use special pond soil and not garden soil or potting soil. Read more about making a good pond soil here . Now you can fill the pond completely with water. Preferably use plain clean tap water for this. Sprinkle the first 10 cm layer evenly into the pond to prevent upwelling of soil types, at the same time you can use the sprinkler to keep further plantings moist. Afterwards, you can fill the pond faster with an open hose, but make sure it is fixed and not directed at soil sections. Rainwater from gutters or rain barrels is less suitable for filling the pond because rainwater is softer and more acidic and can contain excessive levels of nutrients. Before and after filling, take the water meter reading to know the exact content of the pond. You will have included the edging in the design if all goes well. This is another important step, because you need to make sure tiles or beams are level and you also need to take into account the fact that people will be standing on them. In addition, a crooked edge is unsightly. With a natural pond, this is less noticeable and you can more easily camouflage small deviations afterwards with marsh plants.
The contents of the pond are ready except for GH and KH values. The introduction of oxygen plants on the beds can still take place even now if they are oxygen plant forests with reinforcement.
We hope you have learned from this blog and that we have helped you get started with starting a pond. If there are any questions, we are happy to answer them. Did you find this blog interesting? Then please share it on social media on Facebook, for example. We would really appreciate this.
